Welcome to the exciting world of DIY wood deck railing projects! In this beginner-friendly guide, we'll walk you through the basics of creating a sturdy deck railing with wood posts and rails to finish off that deck you're planning or refurbishing.
In this article:
Why Choose Wood?
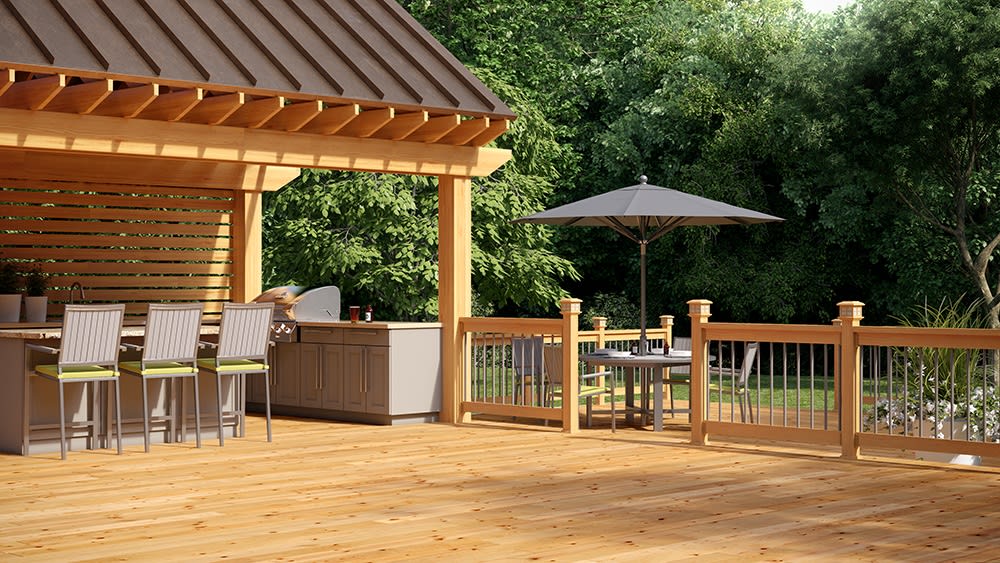
In addition to providing natural beauty that blends so well with the great outdoors, wood is also easy to work with, making it ideal for DIYers using common and familiar tools. It can be a very cost-effective choice, too, depending on the wood variety you select. Plus, you can customize wood railings with a beautiful stain (or paint, for that matter) and get creative when choosing your balusters—the infill between the rails.
Whatever look you envision for your wood railings, this guide will provide simple DIY wood deck railing ideas and set you on the right path to creating the perfect railing for your backyard getaway.
A Word About Posts
Before we talk about wood deck railing ideas, we need to discuss posts. If you're adding a wood railing, it goes without saying that you need posts to attach it to. Seems simple enough. But the type of deck posts can vary based on the specific design and construction of the deck. There are three common types to be aware of:
-
Through-Deck Posts: These posts extend through the deck surface and are anchored into the ground below, typically with concrete footings, providing support and stability to the deck structure. Above the decking surface, these posts may be wrapped, or clad, in an additional layer of material to add to their girth, provide protection, and achieve a more finished look.
-
Surface-Mounted Posts: These deck posts are mounted on the surface of the deck and attached with brackets or other hardware to secure them in place.
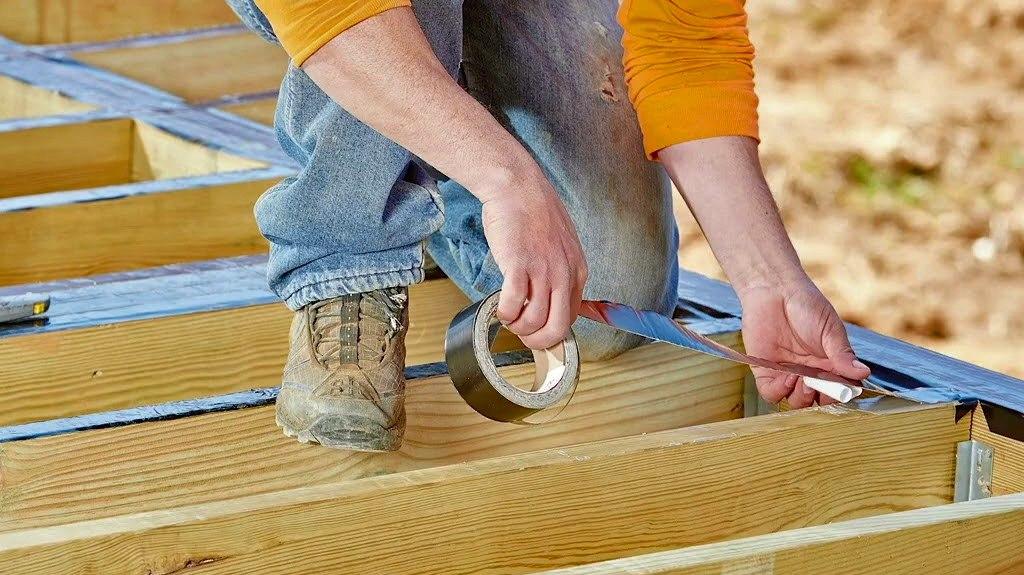
- Fascia-Mounted Posts: These posts are attached with bolts or screws secured through the post and into the deck's fascia board.
TIP: Fascia-mounted posts preserve space, maximizing your deck surface.
Through-deck, surface-mount, and fascia-mount posts
Whether your posts are through-deck, surface-mounted, or fascia-mounted (or a combination) depends on local building codes, the type of soil, the deck height, and the overall design. In many deck designs, through-deck posts serve as primary structural supports, located at the corners, while surface-mounted or fascia-mounted posts are strategically placed between them to provide additional support for the railing system and enhance the overall aesthetic.
For residential decks, a common rule of thumb is that posts should be spaced no more than 8 feet apart. This spacing helps ensure that the railing is adequately supported, maintaining stability and safety. However, local codes may differ, so consult yours for any specific requirements.
Additionally, if you're purchasing infills, the manufacturer may provide recommendations for optimal post spacing. Always follow these guidelines to ensure compliance with safety standards and the best results for your railing project.
Materials for a DIY Wood Deck Railing
Following are the basic materials you'll want to gather as you prepare for your DIY wood deck railing project:
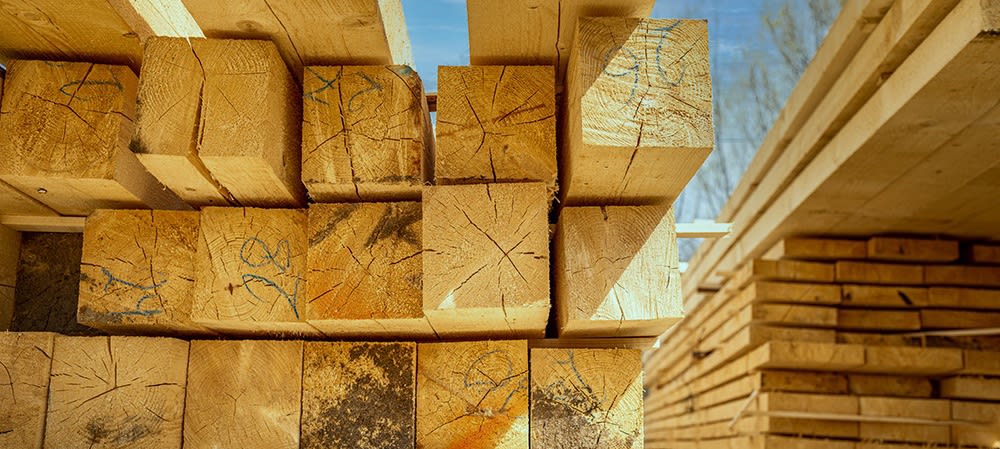
Lumber for Rails and Posts
When it comes to selecting lumber, you have many options. Common and affordable choices like pressure-treated pine, cedar, or redwood offer durability and a classic aesthetic with a moderate level of maintenance.
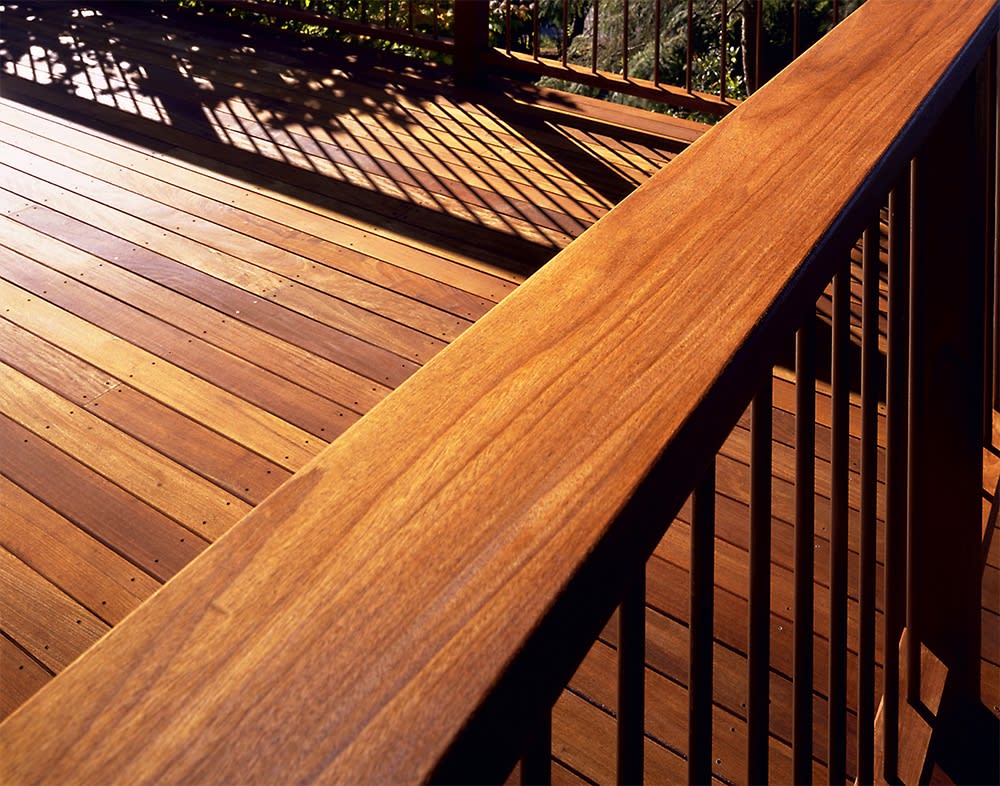
If you're seeking a touch of luxury and unique grain patterns, consider popular exotic hardwoods such as Ipe, Tigerwood, or Mahogany for your railings.
TIP: A notable advantage of exotic hardwoods is their natural oils that contribute to resistance against insects and decay.
For traditional posts, choose between 4x4-inch or 6x6-inch lumber, depending on your design preference. 4x4 posts are the most common choice, however, if you're envisioning a large, substantial deck, you may want to consider robust 6x6 posts. If you're planning for fascia-mounted posts, 2x6 or 2x8 lumber can also be used for a unique profile.
For the horizontal rails, opt for 2x4 or 2x6 boards based on your aesthetic and functional preferences. The 2x6 boards, with their broader surface, are ideal for creating a cocktail rail-style top board, providing more space for placing drinks or small items while 2x4 boards offer a thinner, traditional appearance.
Pressure-treated wood is a popular choice for DIY wood deck railings and decking due to its many advantages. Its treatment process enhances the wood's ability to resist rot and insect damage, ensuring that your deck remains sturdy and long-lasting, even in challenging weather conditions. This makes it an ideal material for outdoor projects.
In addition to its durability, pressure-treated wood is an affordable option compared to materials like cedar or composite. Its widespread availability offers excellent value without compromising quality. Plus, it's easy to customize—whether you want to paint or stain your deck, pressure-treated wood provides the flexibility to achieve the look you desire.
Moreover, many pressure-treated wood products come from sustainably managed forests, allowing you to make an environmentally responsible choice. These benefits make pressure-treated wood a smart option for your DIY wood deck railing project, combining durability with style and sustainability.

Wood post and railing with Key-Link Cable Connectors
Most building guidelines require a minimum railing height of 36 inches for residential decks, but this varies by location. Double-check for any specific regulations applicable in your area.
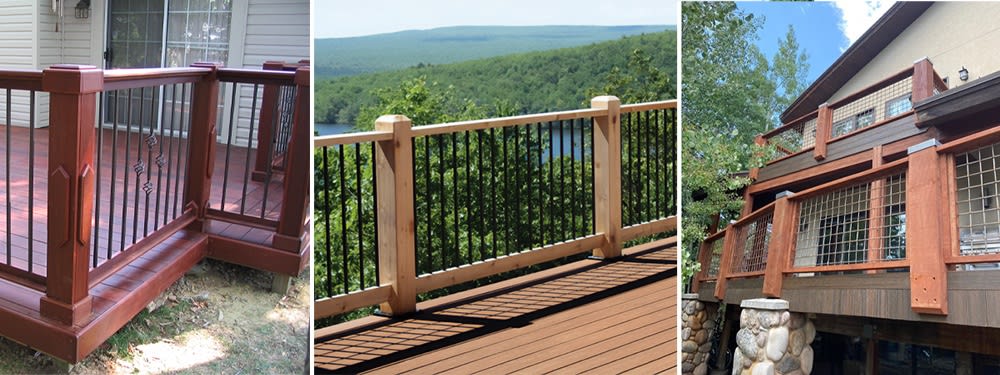
Balusters or Other Infills
The aesthetic appeal of your wood deck railing is significantly influenced by your choice of balusters or infills—the elements that fill the space between the top and bottom rails. Your wooden railing offers you a lot of creative freedom to personalize your outdoor space just the way you like it... and you certainly aren't limited to wood balusters. Here are some popular options to bring on the style:
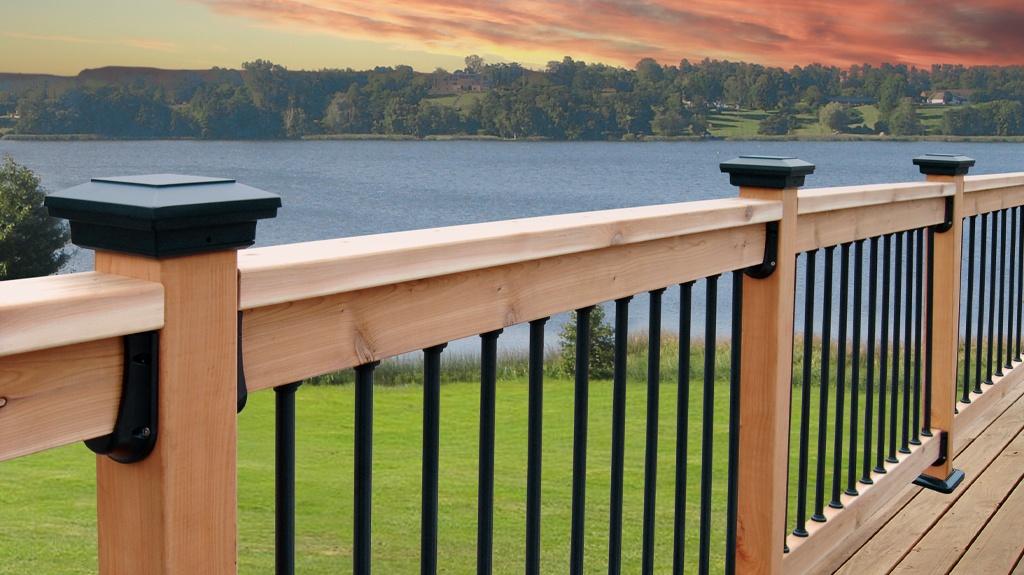
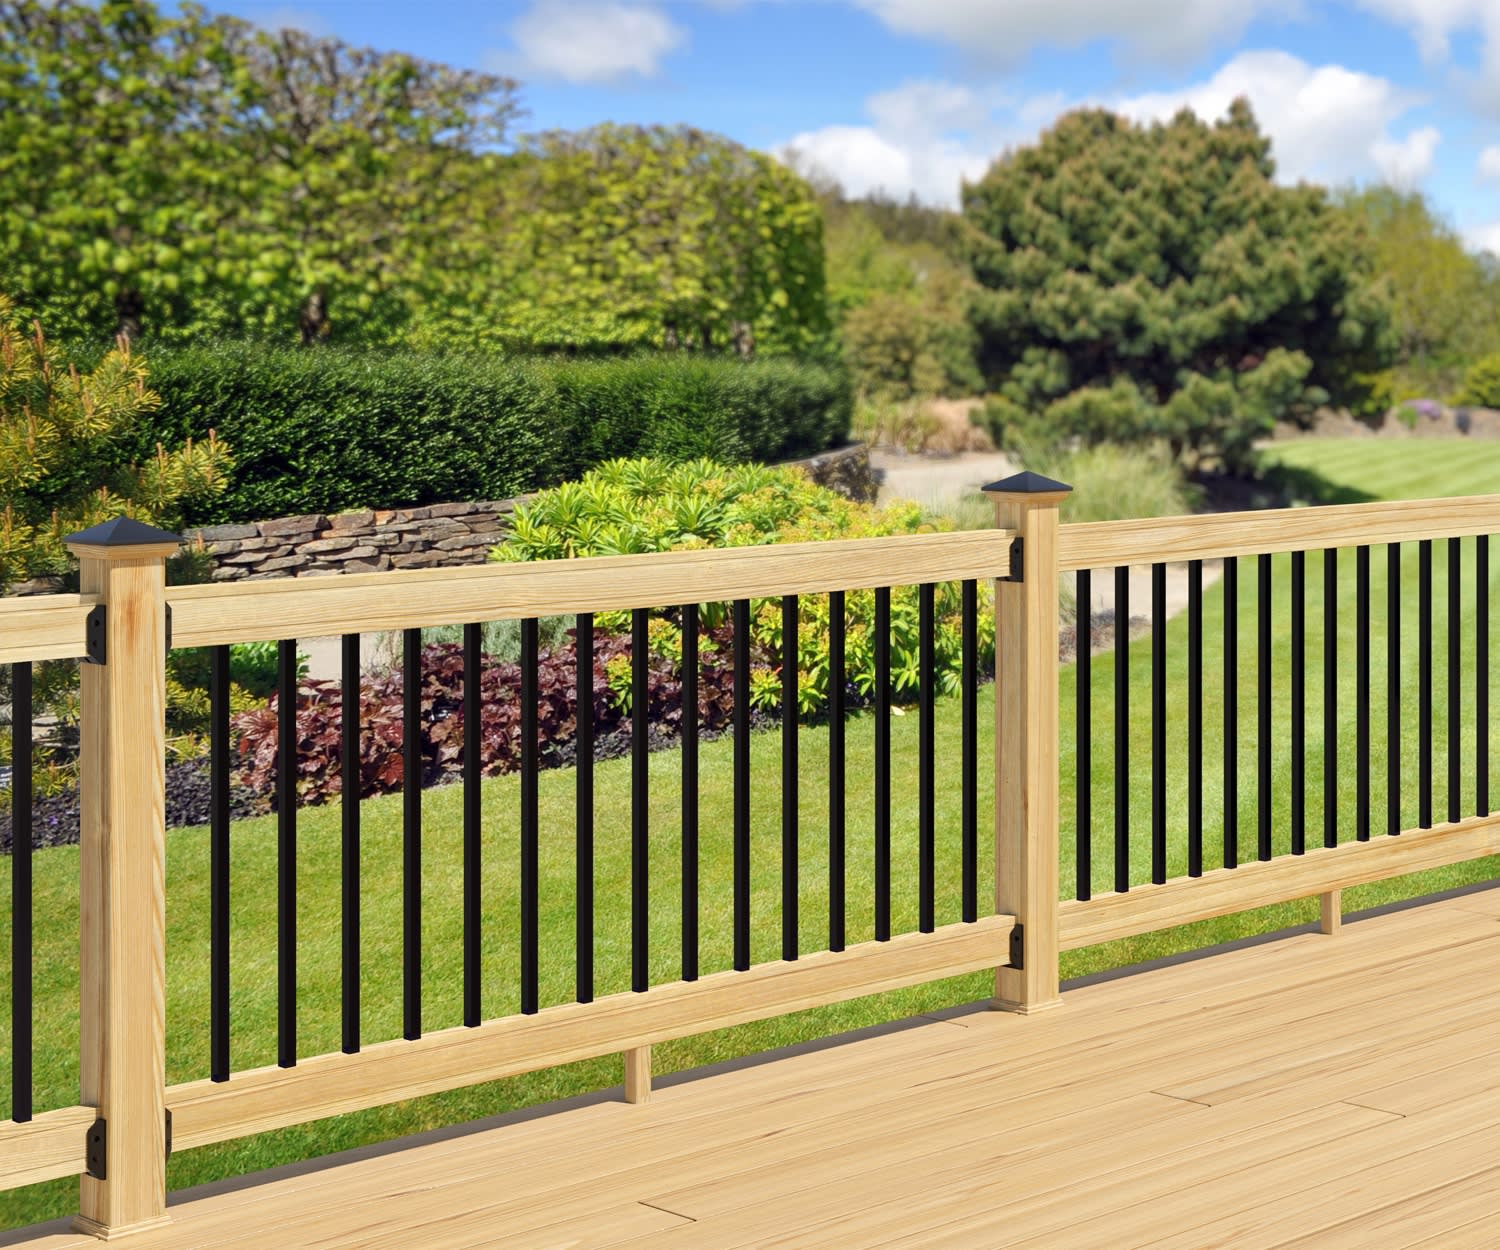
Metal Balusters
If you're after a more modern or streamlined vibe, opt for sleek metal balusters. Square and round styles introduce a contemporary touch to your railing, while decorative options can infuse old-world charm. For a visually dynamic design, consider alternating metal balusters with wood.
Deckorators Classic Round Balusters

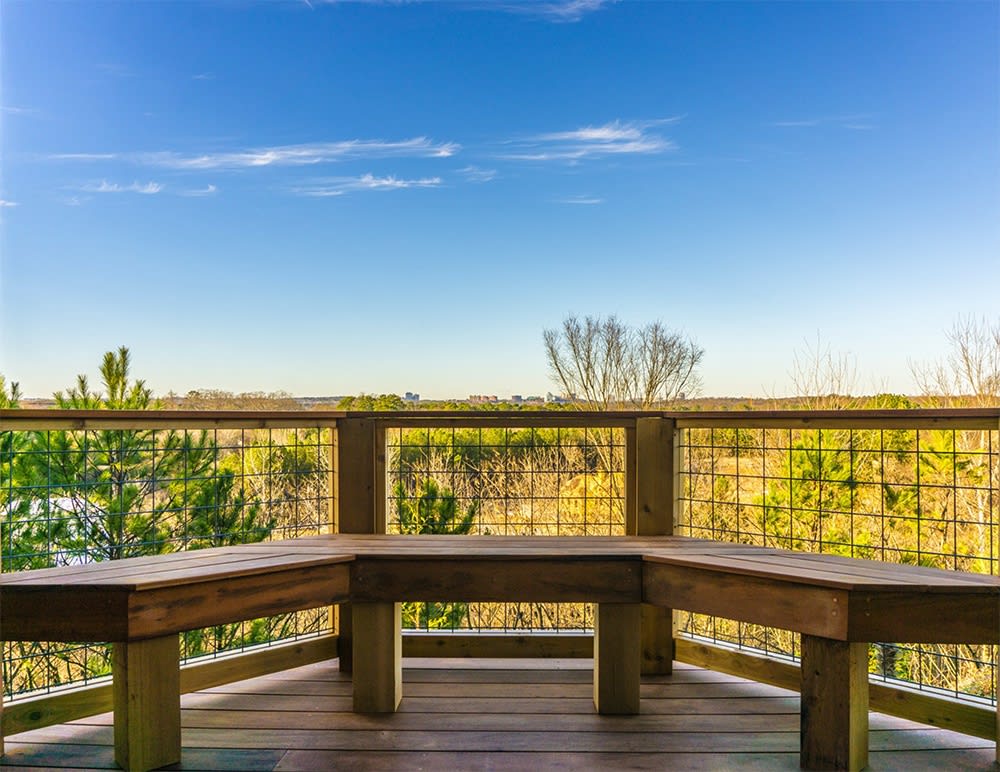
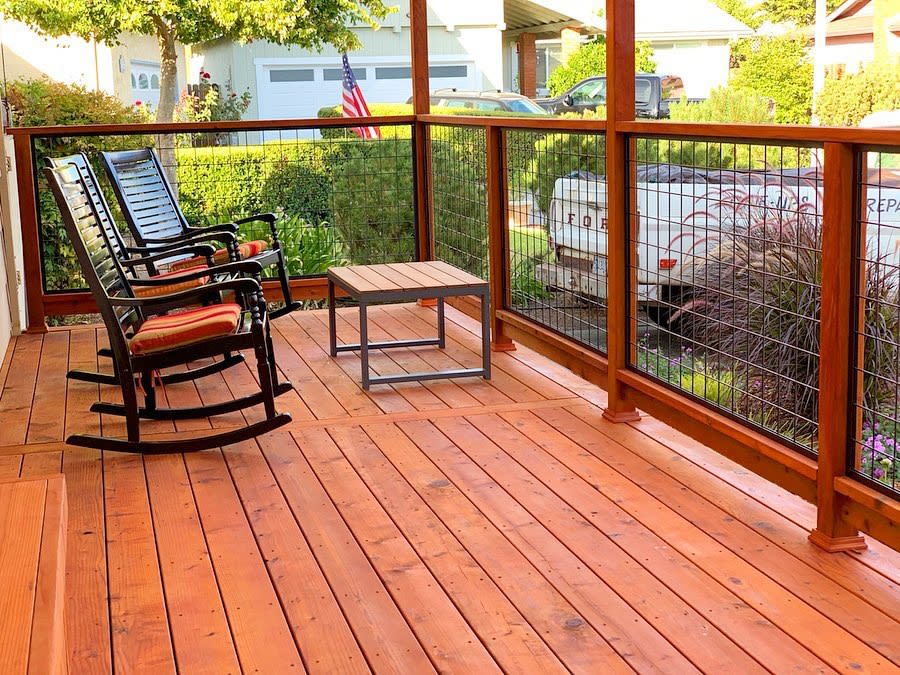
Mesh Panels
For a distinctive look with increased visibility, explore metal mesh panels as an infill option. These panels provide a unique visual appeal, complementing wood rails with an aesthetic that can range from rustic to contemporary.

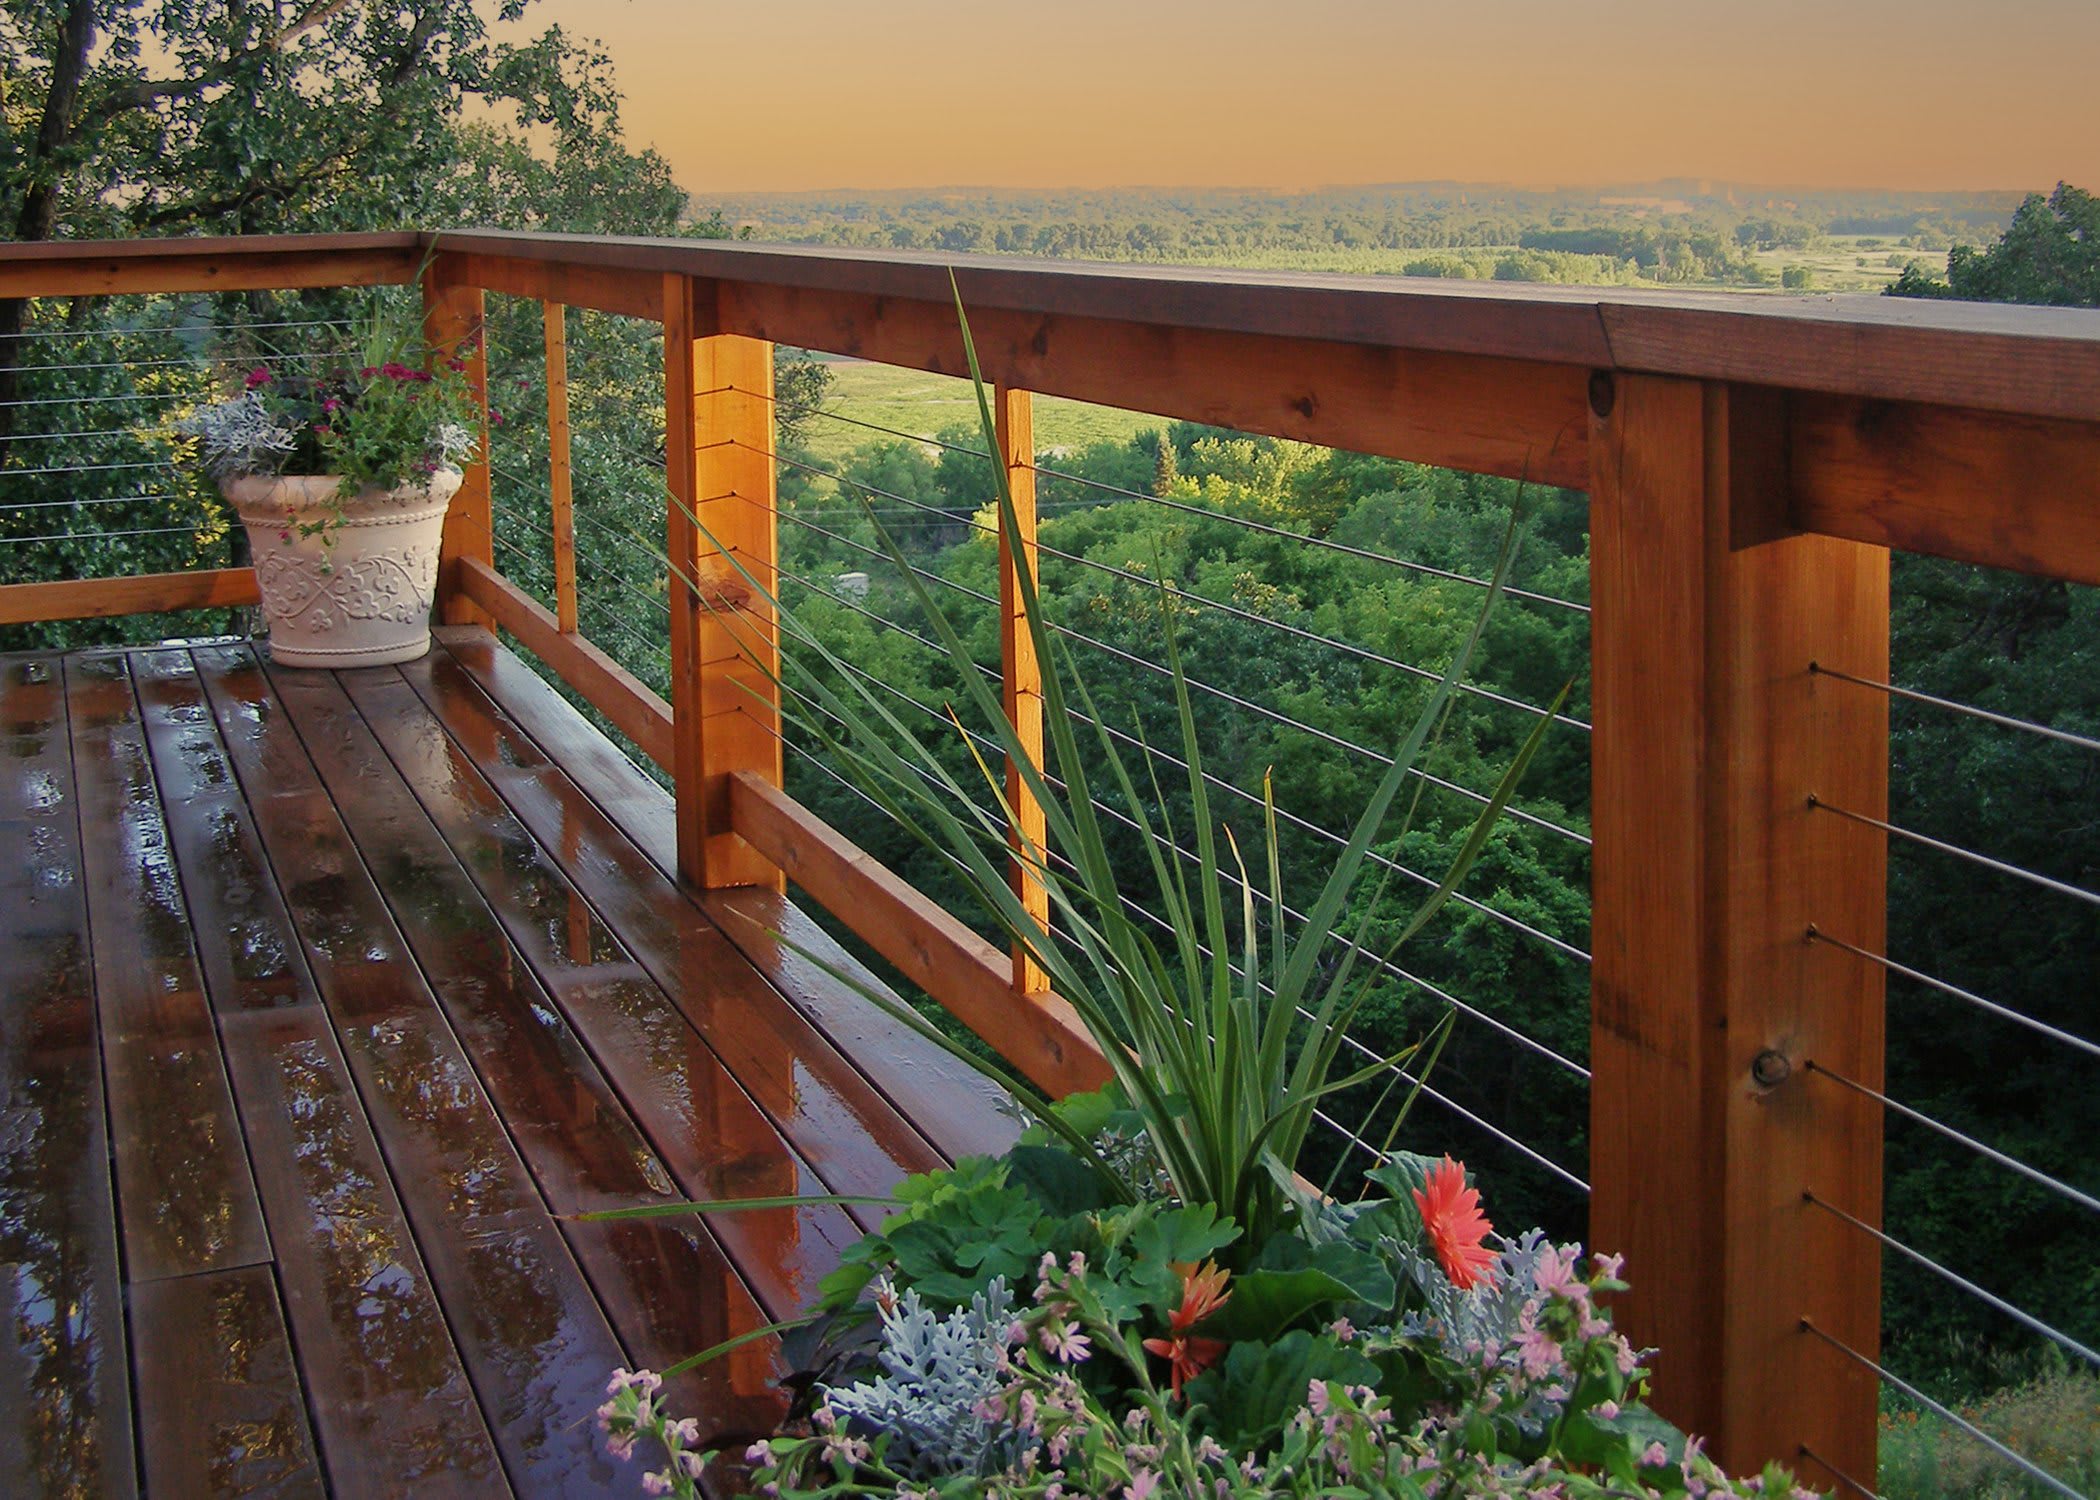
Cable Railings
Providing a sleek and unobtrusive appearance, cable railings are a popular choice that pairs well with stained or natural wood rails. The thin cables create an open feel, ideal for a minimalist look.

Glass Infills
For a touch of modern elegance and uninterrupted views, consider glass infills. These glass panels or pickets provide a sleek and transparent aesthetic, allowing you to enjoy the surrounding scenery without interruption.

Remember, your infills not only contribute to the overall aesthetic of your deck, they're also safety features. Generally, railing baluster and infill gaps, as well as the space between the decking and bottom rail, must not exceed 4 inches wide. As always, check and follow your local building codes.

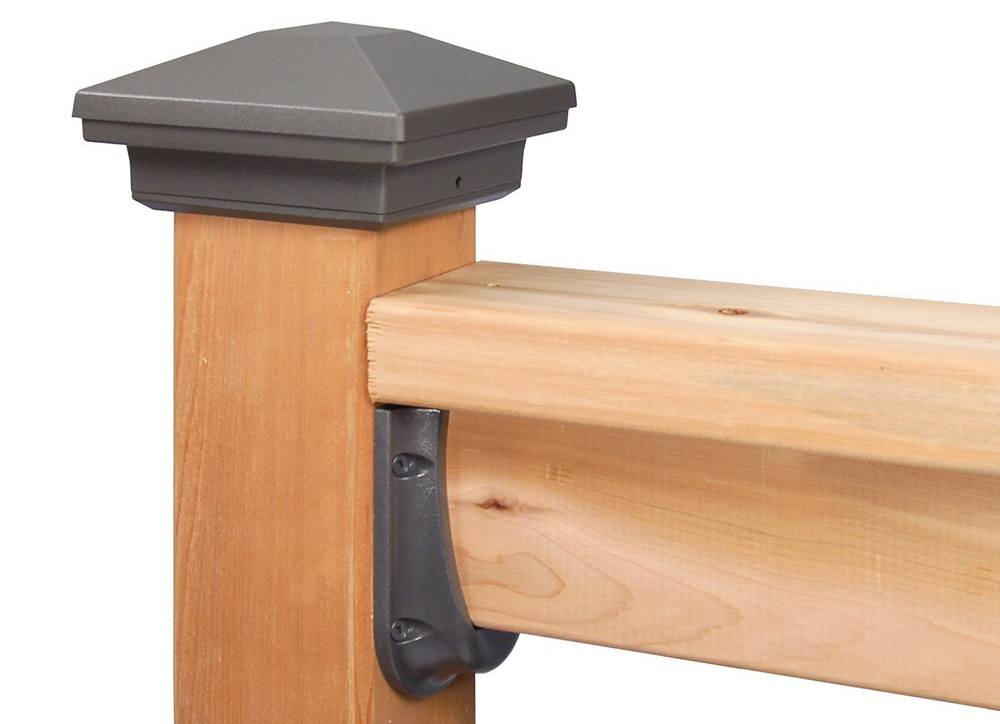
Connectors
You'll likely need wood post anchors or connectors to connect surface-mounted posts to your deck surface and railing connectors to secure the top and bottom rails to the posts. Additionally, if you're using square or round metal balusters, they'll probably require baluster connectors to secure them to the top and bottom rails. If you're installing cables, you'll have fittings for your terminal ends. Together, all your various connectors provide support and stability to your railing system.

Fasteners
When it comes to fasteners, stainless steel screws are an excellent choice for their durability and resistance to the elements. For premium corrosion protection and for use in coastal applications, consider hot-dip galvanized structural wood screws.
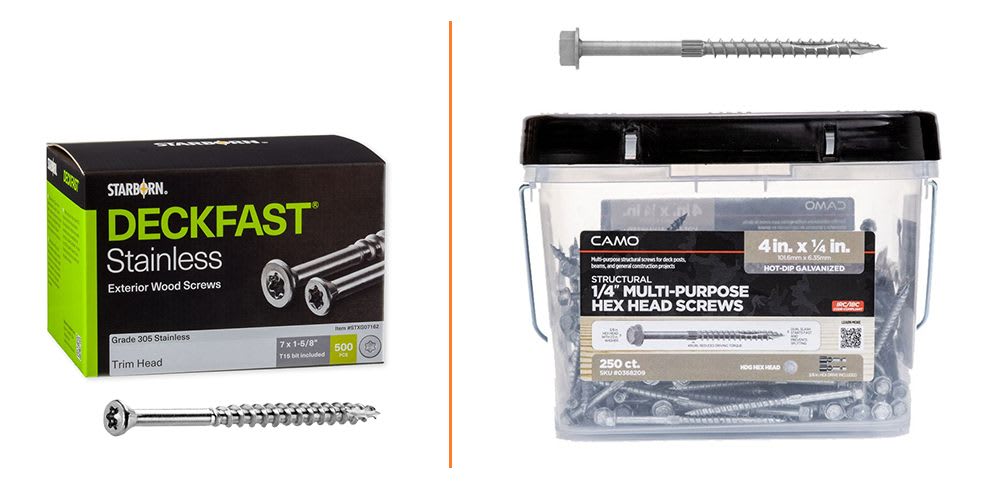
Starborn Deckfast Stainless and CAMO Hot Dip Galvanized Screws

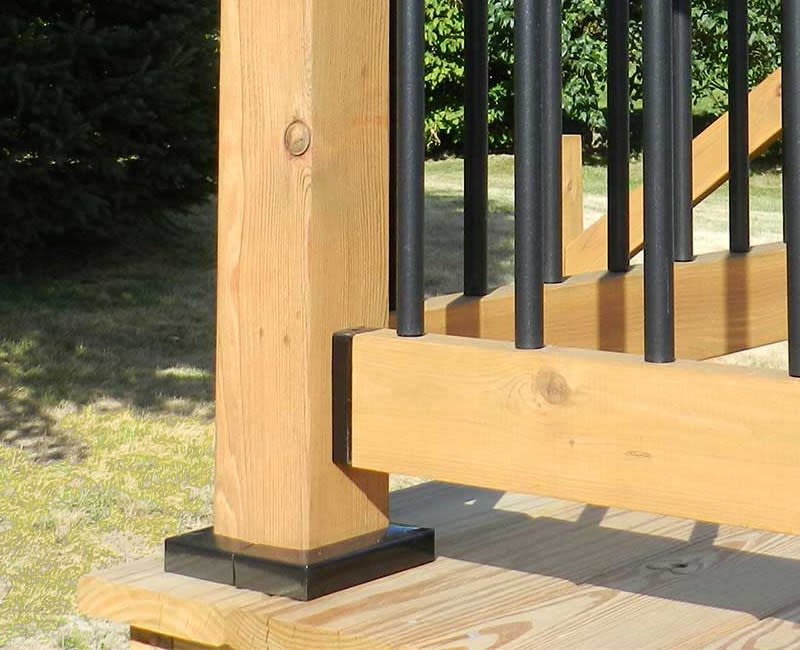
Trim Skirts
Covering the gaps between your deck and the bottom of the railing, trim skirts or post bases can be used to enhance the overall finished appearance, protect the bottom of the post from moisture, and prevent pests from taking up residence in those cozy crevices.

A Close Look at Post Caps
Post caps do more than just top off your DIY wood deck railing — they add structure, durability, and a finished look that makes the whole setup feel intentional rather than just functional. A well-installed rail cap ties the railing together and protects your posts.
Why Post Caps Matter
Post caps provide:
- Protection from the Elements: Exposed post tops take a beating from rain and sun, leading to splitting, warping, and eventual rot. A rail cap acts as a shield, keeping moisture out and extending the life of your DIY wooden deck railing.
- Aesthetic Upgrade: A deck without post caps looks unfinished. Whether you go for a classic beveled edge or something more intricate, the right cap design adds polish without extra effort.
Installing post caps is a simple step that makes a big difference. It locks everything in place, extends the life of your wood deck railing installation, and gives your deck a finished, professional look.
For some inspiration, check out Cap-tivating Post Caps to Suit Your Personality.
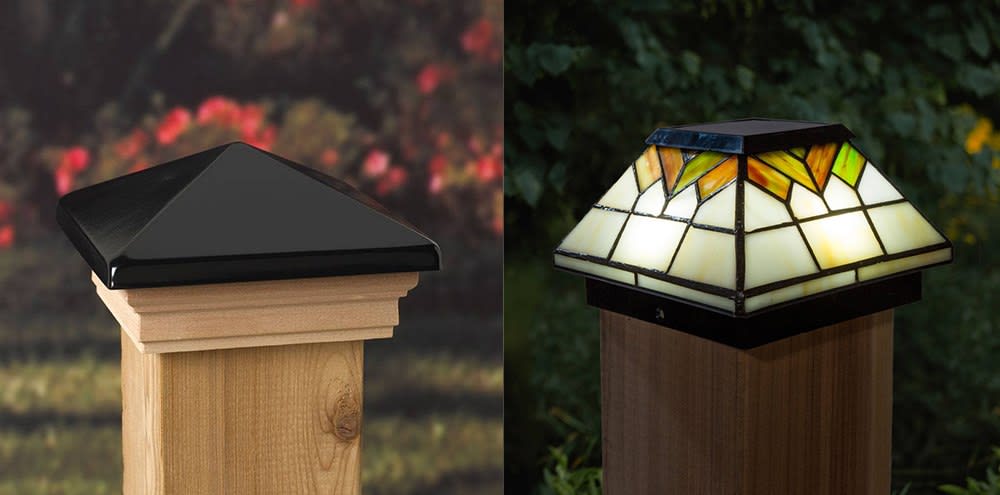 Deckorators Victoria High Point and Classy Caps Wellington Stained Glass Solar Post Caps

Tools to Install a DIY Wood Deck Railings
These are the basic tools you should plan to have on hand for your wood railing project:
- Circular Saw or Miter Saw
- Power Drill with Bits
- Level
- Carpenter's Square
- Chalk Line
- Safety Glasses and Gloves
TIP: If you're installing a new wood deck surface as part of your project, be sure to check out the CAMO Marksman Pro Kit that includes the hand drive tool, deck screws, and bits. This edge-fastening system provides an easy DIY installation, time-savings, and a fastener-free deck surface.
When you work on a DIY wood porch railing, always check the instructions that come with any items you purchase; the manufacturer knows how to get the best results from their product, so if they recommend a certain tool or accessory be used, follow their expert advice.
Preparing the Deck Frame Before Installing Railings
Before you learn how to build a wooden deck railing, you need to ensure you have a solid foundation. A wobbly deck frame isn’t just an eyesore —it’s a problem waiting to happen. Railings rely on a stable structure for support, so skipping this step could mean dealing with loose posts, shifting boards, or worse, a full teardown later.
Start with a thorough inspection:
- Check the Ledger BoardThis is the backbone of your deck. If it’s not securely bolted to the house, you’re building on borrowed time. Tighten any lag bolts and reinforce weak spots before moving on.
- Inspect Joists and BlockingLook for sagging, warping, or any signs of rot. If your joists feel flimsy, adding extra blocking between them can stiffen things up. Deck anchors and additional bracing can help.
Once you’ve checked these structural elements, make any necessary adjustments before laying decking boards. A rock-solid frame means a railing that stays put — no wobbling, no rework, just a clean, professional install.
Basics Steps to Install a Wood Deck Railing
These basic steps will give you a starting point, helping you anticipate what's ahead and begin planning your wood railing installation.
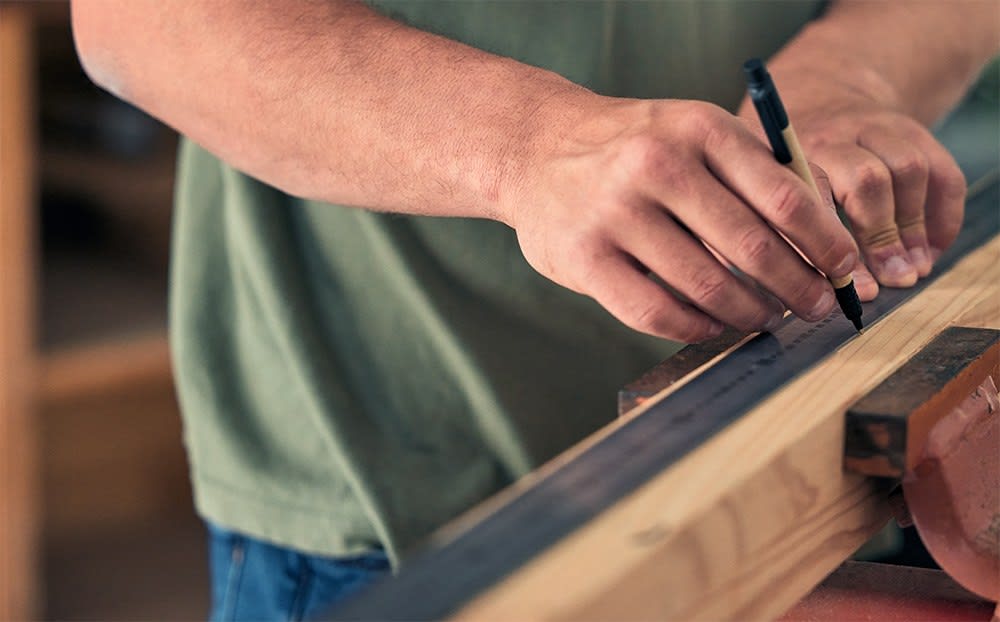
Step 1: Measure and Cut Posts and Railings
Begin your DIY wood deck railing project by determining the optimal lengths for your posts and railings. Consider the following:
- Post Spacing: Typically, building codes recommend post spacings of 6 to 8 feet; plan your spacing to create a visually balanced railing.
- Post and Railing Heights: Determine the appropriate height for your posts based on your project's design and local regulations.
- Railing Lengths: Remember to plan for any overhangs or terminations at the ends of the railing.
- Material Considerations: Different wood types may have specific cutting recommendations. Be mindful of any guidelines or considerations for your chosen wood variety.
- Local Regulations: Local codes may vary; always adhere to local building regulations and codes for precise requirements regarding posts and railings.
Use a chalk line to accurately mark your post positions.
Step 2: Install Posts
Place your posts in the marked locations, securing surface mounts with connectors and fascia mounts with corrosion-resistant screws or bolts. Use a level to ensure each post is straight.
Step 3: Add Bottom Rail
Attach the bottom rail board to the posts. Predrill holes for screws to prevent splitting or choose self-tapping screws, and use a carpenter's square to ensure a right angle.
Step 4: Insert Balusters or Infill
Install your chosen balusters between the bottom and top rails with connectors as recommended, ensuring they are evenly placed. Refer to local codes for recommended spacing, as this can vary.
Deckorators Estate Square Balusters
Always refer to the installation instructions provided with your chosen railing infill to understand the proper sequencing and any specific steps required for a smooth installation process before you begin. If you've opted for a metal mesh infill like Wild Hog Railing Panels, for example, you'll need to install the channels to hold your infill by screwing them to the rails and posts.
Step 5: Attach Top Rail
Secure the 2x4 or 2x6 top rail to the posts, completing the framework. Attach the top rail with screws and check for level using a carpenter's level.
Step 6: Add Post Caps and Trim Skirts
Finish your project by adding post caps on top and trim skirts at the bottom of your posts to conceal any gaps between the posts and the deck.
TIP: Apply a clear wood preservative to your post ends before adding caps for extra protection.
Maintaining Your DIY Wood Deck Railing
Congratulations on completing your wood deck railing! To keep it looking its best, remember:
Stain and Seal
Apply a wood stain or sealant to protect it from the elements and enhance its appearance. Follow the manufacturer's instructions and make sure your railing is dry before beginning an application.
Regular Inspection
Periodically check for loose screws, damaged balusters, or any signs of wear and make timely repairs. For more considerations when evaluating your deck, check out Time for a Deck Check.
Cleaning
A gentle wash with mild soap and water will keep your railing looking fresh. Use a soft bristle brush to avoid damaging the wood and rinse thoroughly to remove any cleaning residue.

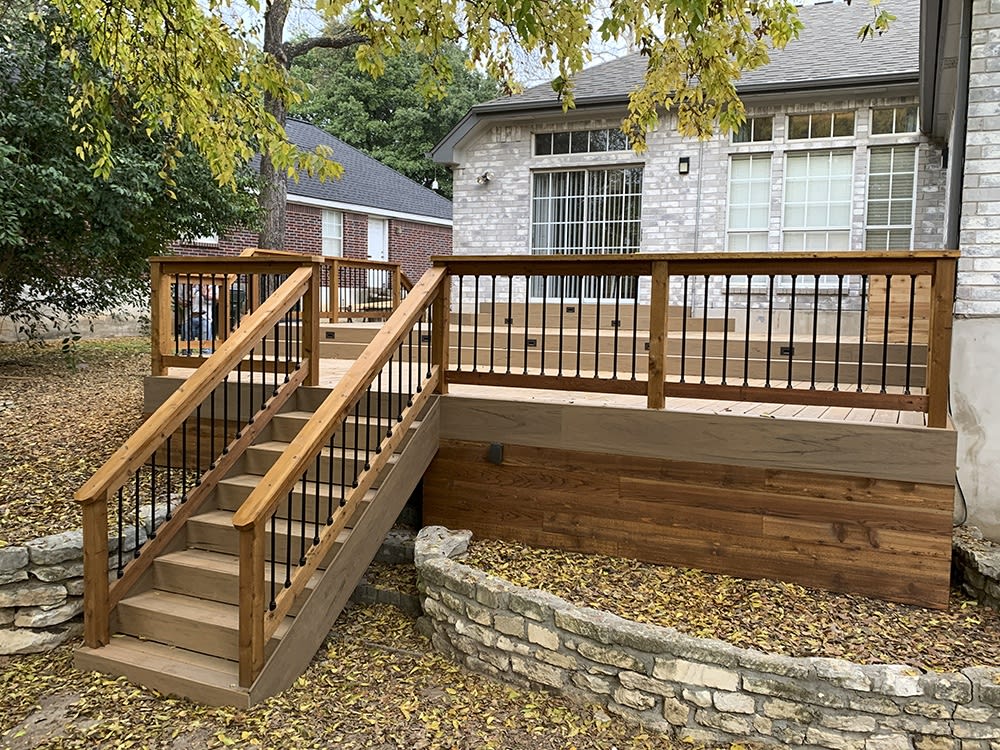
Enjoy Your Deck
With your wood deck railing in place, it's time to celebrate the completion of your project by unwinding in your outdoor haven! Whether hosting gatherings or sipping morning coffee, your deck is now the retreat you knew it could be. Congratulations on the successful transformation of your space—enjoy every moment!
Titan Snap 'n Lock Round Baluster Kit
Check your local building codes before starting your railing project and follow all rules, regulations, and requirements.
Order Wood Deck Railing Supplies From DIY Home Center
Your DIY wood deck railing is the finishing touch that makes your deck feel complete. Get the right materials the first time with high-quality lumber, fasteners, and rail components from DIY Home Center, so your railing stays sturdy and looks sharp for years. Shop now and build with confidence, knowing you’re getting pro-grade supplies delivered straight to your door.
Shop Deck ProductsFrequently Asked Questions About DIY Wood Deck Railings
The $4.1 billion North American deck market can be challenging to navigate. But DIY Home Center has the information you need. Here are some common questions we receive about DIY wood deck railings.
What's the best wood to use for a DIY wood deck railing?
The best choice depends on durability, budget, and aesthetics. Pressure-treated lumber is the most budget-friendly and resists rot, but it needs sealing. Cedar and redwood naturally resist decay and look great, though they cost more. For a high-end look with less upkeep, composite options can mimic wood without the maintenance.
How tall should a wood deck railing be?
Most local building codes require a railing height of at least 36 inches for residential decks and 42 inches for commercial spaces. Always check local codes before starting your DIY wood deck railing installation since regulations vary.
Can I attach a wood deck railing to an existing deck?
Absolutely, but it depends on the deck's structure. If your frame is solid and your posts are secured properly, you can add a DIY wood deck railing without issue. If the deck frame is aging or wasn't built with railings in mind, you may need extra reinforcement before installation.